CAN通信

OrangePi PCでCANを使う


前回、Raspberry PiでCAN通信を行う方法を紹介しました。
そこで、今回はOrangePi PC(H3)でCAN通信を行う方法を紹介します。

まず最初にOverlayモジュールをインストールしますが、標準で含まれているdtc(Device Tree Compiler)は、
Overlayモジュールのコンパイルに対応していません。
そこで、Overlayモジュールのコンパイルに対応したdtcへのアップデートを行います。

以下からdtc-1.4.7.tar.gzをダウンロードして展開します。
https://git.kernel.org/pub/scm/utils/dtc/dtc.git
dtcの最新は1.5.0ですがビルドが通りません。
$ dtc -v
Version: DTC 1.4.2

$ wget https://git.kernel.org/pub/scm/utils/dtc/dtc.git/snapshot/dtc-1.4.7.tar.gz
$ tar xvfz dtc-1.4.7.tar.gz
$ cd dtc-1.4.7/
$ make
$ sudo cp ./dtc /usr/bin/

$ dtc -v
Version: DTC 1.4.7

次に以下からOverlayモジュールをダウンロードしてコンパイルします。
https://github.com/armbian/sunxi-DT-overlays
$ git clone https://github.com/armbian/sunxi-DT-overlays
$ cd sunxi-DT-overlays
$ cd examples/
$ ls
gpio-button.dts     i2c-pca857x.dts  spi-double-spidev-bus.dts
i2c-apds9960.dts    README.md        spi-double-spidev-cs.dts
i2c-ds1307.dts      sht1x.dts        spi-enc28j60.dts
i2c-edt-ft5x06.dts  spi-ad9833.dts   spi-mcp251x.dts
i2c-ina219.dts      spi-ads7846.dts

$ sudo armbian-add-overlay ./spi-mcp251x.dts
Compiling the overlay
Copying the compiled overlay file to /boot/overlay-user/
Reboot is required to apply the changes

「/boot/armbianEnv.txt」にOverlayモジュールを組み込みます。
変更後の「/boot/armbianEnv.txt」は以下の様になります。
verbosity=1
logo=disabled
console=both
disp_mode=1920x1080p60
overlay_prefix=sun8i-h3
rootdev=UUID=4c260e6c-6b83-490b-9c33-a1c61c5840a5
rootfstype=ext4
overlays=i2c0 i2c1 i2c2 spi-spidev
extraargs=net.ifnames=0
##param_spidev_spi_bus=0 → 組み込まない
usbstoragequirks=0x2537:0x1066:u,0x2537:0x1068:u
user_overlays=spi-mcp251x

全体の回路はこちらと同じですがMCP2515の発振器は8Mhz にする必要が有ります。
INTピンのGPIO(PA7)とMCP2515のクロック数(8MHz)はOverlayモジュールの中で固定されています。
これらを変更する場合は、spi-mcp251x.dtsの以下の部分を変更する必要が有ります。
clock-frequency  = <8000000>;
pins = "PA7";

このファイルはテキストファイルなので見ればすぐに分かります。
OrangePiとMCP2515との接続は以下の様に なります。
OrangePi PC MCP2515
3.3V VDD
GND GND
PC0(#19) SI
PC1(#21) SO
PC2(#23) SCK
PC3(#24) CS PullUpする必要が有ります
PA7(#29) INT PullUpする必要が有ります

RESET PullUpする必要が有ります

ここまで終わったらリブートします。


再起動後に以下の内容を確認します。
$ dmesg| grep can
[    5.518069] mcp251x spi0.0 can0: MCP2515 successfully initialized.

$ lsmod | grep can
can_dev                20480  1 mcp251x

$ ls /sys/bus/spi/devices/spi0.0
driver  modalias  net  of_node  power  statistics  subsystem  uevent

$ ls /sys/bus/spi/devices/spi0.0/net
can0

$ ls /sys/bus/spi/devices/spi0.0/net/can0
addr_assign_type    dev_id             link_mode         proto_down
address             dev_port           mtu               queues
addr_len            dormant            name_assign_type  speed
broadcast           duplex             netdev_group      statistics
carrier             flags              operstate         subsystem
carrier_changes     gro_flush_timeout  phys_port_id      tx_queue_len
carrier_down_count  ifalias            phys_port_name    type
carrier_up_count    ifindex            phys_switch_id    uevent


CANのLinkUpは以下の手順です。
bitrateで転送スピードを指定します。
指定することができる値はこ ちらなどに公開されていますが、他のノードと合わせる必要が有ります。
OrangePiから送信する場合、500Kが限界みたいです。
多量のデータを送信する場合は、txqueuelenを増やしておかないと、エラーになります。
$ sudo ip link set can0 type can bitrate 500000 triple-sampling on

$ sudo ifconfig can0
can0: flags=128<NOARP>  mtu 16
        unspec 00-00-00-00-00-00-00-00-00-00-00-00-00-00-00-00  txqueuelen 10  (UNSPEC)
        RX packets 0  bytes 0 (0.0 B)
        RX errors 0  dropped 0  overruns 0  frame 0
        TX packets 0  bytes 0 (0.0 B)
        TX errors 0  dropped 0 overruns 0  carrier 0  collisions 0

$ sudo ifconfig can0 up

$ sudo ifconfig can0
can0: flags=193<UP,RUNNING,NOARP>  mtu 16
        unspec 00-00-00-00-00-00-00-00-00-00-00-00-00-00-00-00  txqueuelen 10  (UNSPEC)
        RX packets 0  bytes 0 (0.0 B)
        RX errors 0  dropped 0  overruns 0  frame 0
        TX packets 0  bytes 0 (0.0 B)
        TX errors 0  dropped 0 overruns 0  carrier 0  collisions 0

$ sudo ifconfig can0 txqueuelen 1000

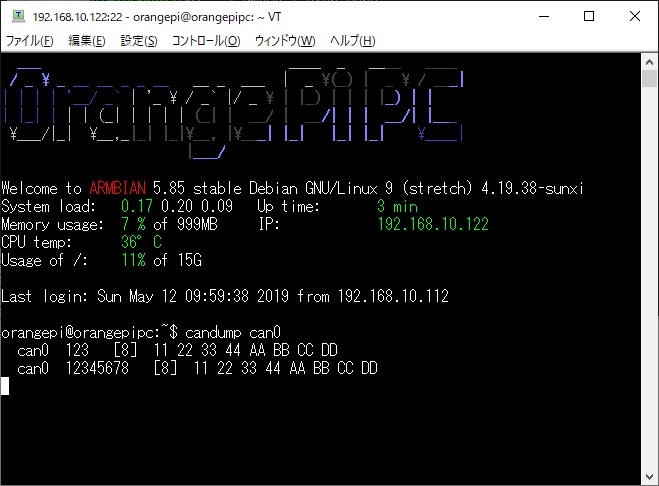
後はRaspberryPiと同様に、can-utilsを使ってCANの通信を行うことができます。
$ sudo apt install can-utils

$ candump can0

$ cansend can0 123#11223344AABBCCDD


続く...