RaspberryとArduinoの無線通信

nRF24L01(その6)

今まで色々試してきましたが、全てRaspberry側がサーバー、Arduino側がクライアントの動作ばかりでした。


そこで、今回はRaspberry側がクライアント、Arduino側がサーバの動作を紹介します。


【Arduino側】

Arduino側のスケッチは以下の通りです。
クライアントから受信したデータを+1して応答する簡単なサーバーアプリです。
/*
 * nRF24L01 Receive And Responce Demo
 *
 * VCC  3.3V
 * MISO 12
 * MOSI 11
 * SCK  13
 * CE   7
 * CSN  8
 */
#include <SPI.h>
#include "RF24.h"

// Set up nRF24L01 radio on SPI bus plus pins 9 & 10
RF24 radio(7, 8);

// Radio pipe addresses for the 2 nodes to communicate.
byte addresses[][6] = {"1Node","2Node"};

void setup(void)
{
  Serial.begin(115200);
  Serial.println("nRF24L01 Receive And Responce Demo");

  radio.begin();

  // Set the PA Level low to prevent power supply related issues since this is a
  // getting_started sketch, and the likelihood of close proximity of the devices. RF24_PA_MAX is default.
  radio.setPALevel(RF24_PA_LOW);
 
  radio.openWritingPipe(addresses[0]);
  radio.openReadingPipe(1,addresses[1]);
  radio.startListening();
}

void loop(void)
{
  unsigned long rdata;
  unsigned long sdata;

  // if there is data ready
  if ( radio.available() )
  {
    // Fetch the payload, and see if this was the last one.
    radio.read( &rdata, sizeof(unsigned long) );

    // Spew it
    sdata = rdata + 1;
    Serial.print("rdata=");
    Serial.print(rdata);
    Serial.print("-->sdata=");
    Serial.println(sdata);
    radio.stopListening();
    radio.write( &sdata, sizeof(unsigned long) );
    radio.startListening();   
  } // end if
}


【Raspberry側】

Raspberry側のコード(SendSimple.cpp)は以下の通りです。
相手がArduinoでも、radio.write()の戻り値で送信成功したかどうか判断することができます。
#include <cstdlib>
#include <iostream>
#include <sstream>
#include <string>
#include <unistd.h>
#include <RF24/RF24.h>


using namespace std;
//
// Hardware configuration
//

// CE Pin, CSN Pin, SPI Speed

// Setup for GPIO 22 CE and CE1 CSN with SPI Speed @ 4Mhz
//RF24 radio(RPI_V2_GPIO_P1_22, BCM2835_SPI_CS1, BCM2835_SPI_SPEED_4MHZ);

// Setup for GPIO 22 CE and CE0 CSN with SPI Speed @ 4Mhz
RF24 radio(RPI_V2_GPIO_P1_22, BCM2835_SPI_CS0, BCM2835_SPI_SPEED_4MHZ);

// Setup for GPIO 22 CE and CE0 CSN with SPI Speed @ 8Mhz
//RF24 radio(RPI_V2_GPIO_P1_22, BCM2835_SPI_CS0, BCM2835_SPI_SPEED_8MHZ);

// Radio pipe addresses for the 2 nodes to communicate.
const uint8_t pipes[][6] = {"1Node", "2Node"};

#define RETRY    10
#define DEBUG    0

int RadioAvailable() {
  int i;
  for (i=0;i<RETRY;i++) {
    if (radio.available()) return 1;
if(DEBUG)printf("Waiting..\n");
    sleep(1);
  }
  return 0;
}

int main(int argc, char** argv){
  // Setup and configure rf radio
  radio.begin();
  radio.openWritingPipe(pipes[1]);
  // 応答を待つときはPipeの1番目から使う
  radio.openReadingPipe(1,pipes[0]);
  radio.printDetails();
  //radio.startListening();

  unsigned long sdata = 0;
  unsigned long rdata;
  // forever loop
  while(1) {
    // First, stop listening so we can talk.
    radio.stopListening();
    int ret=radio.write( &sdata, sizeof(sdata) );
    printf("radio.write ret=%d sdata=%lu\n",ret,sdata);
    if (ret) {
      // Now, continue listening
      radio.startListening();
      while(1) {
        if ( RadioAvailable() ) break;
      }
      radio.read( &rdata, sizeof(rdata) );
      printf("rdata=%lu\n",rdata);
      sdata++;
    }
    sleep(1);
  } // end for
}

examples_linuxディレクトリにあるMakefileの「PROGRAMS =」の末尾に「SendSimple」を追加してMakeします。
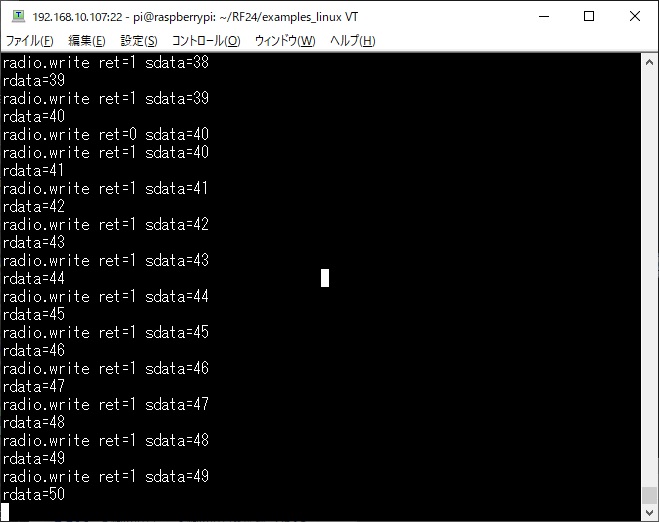
実行すると以下の表示となります。
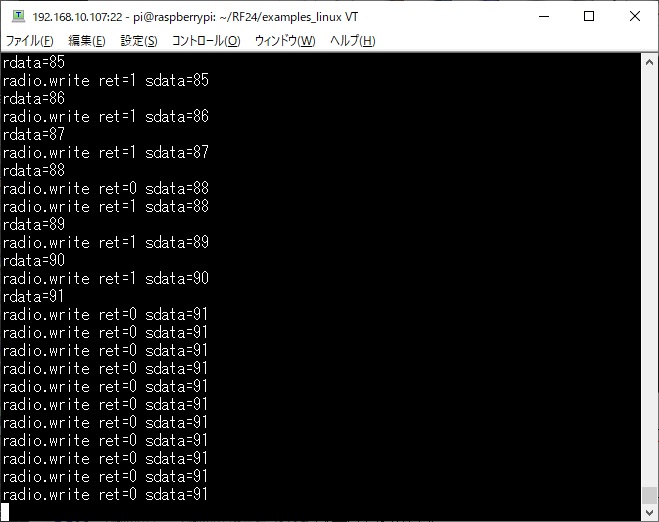
時々、送信に失敗します。


Arduinoへの給電をやめると、送信失敗を検出できますが、Arduinoを再起動しても再開できないことが多いです。
Arduinoをクライアントとして使った方が安定して動きます。


このライブラリのWiKiページがこちらに有ります が、ESP8266やATtinyでも動くみたいです。
また、NetwowrkやMeshのAddOnも有ります。

続く...