/*
* 1602 LCD Sample
*
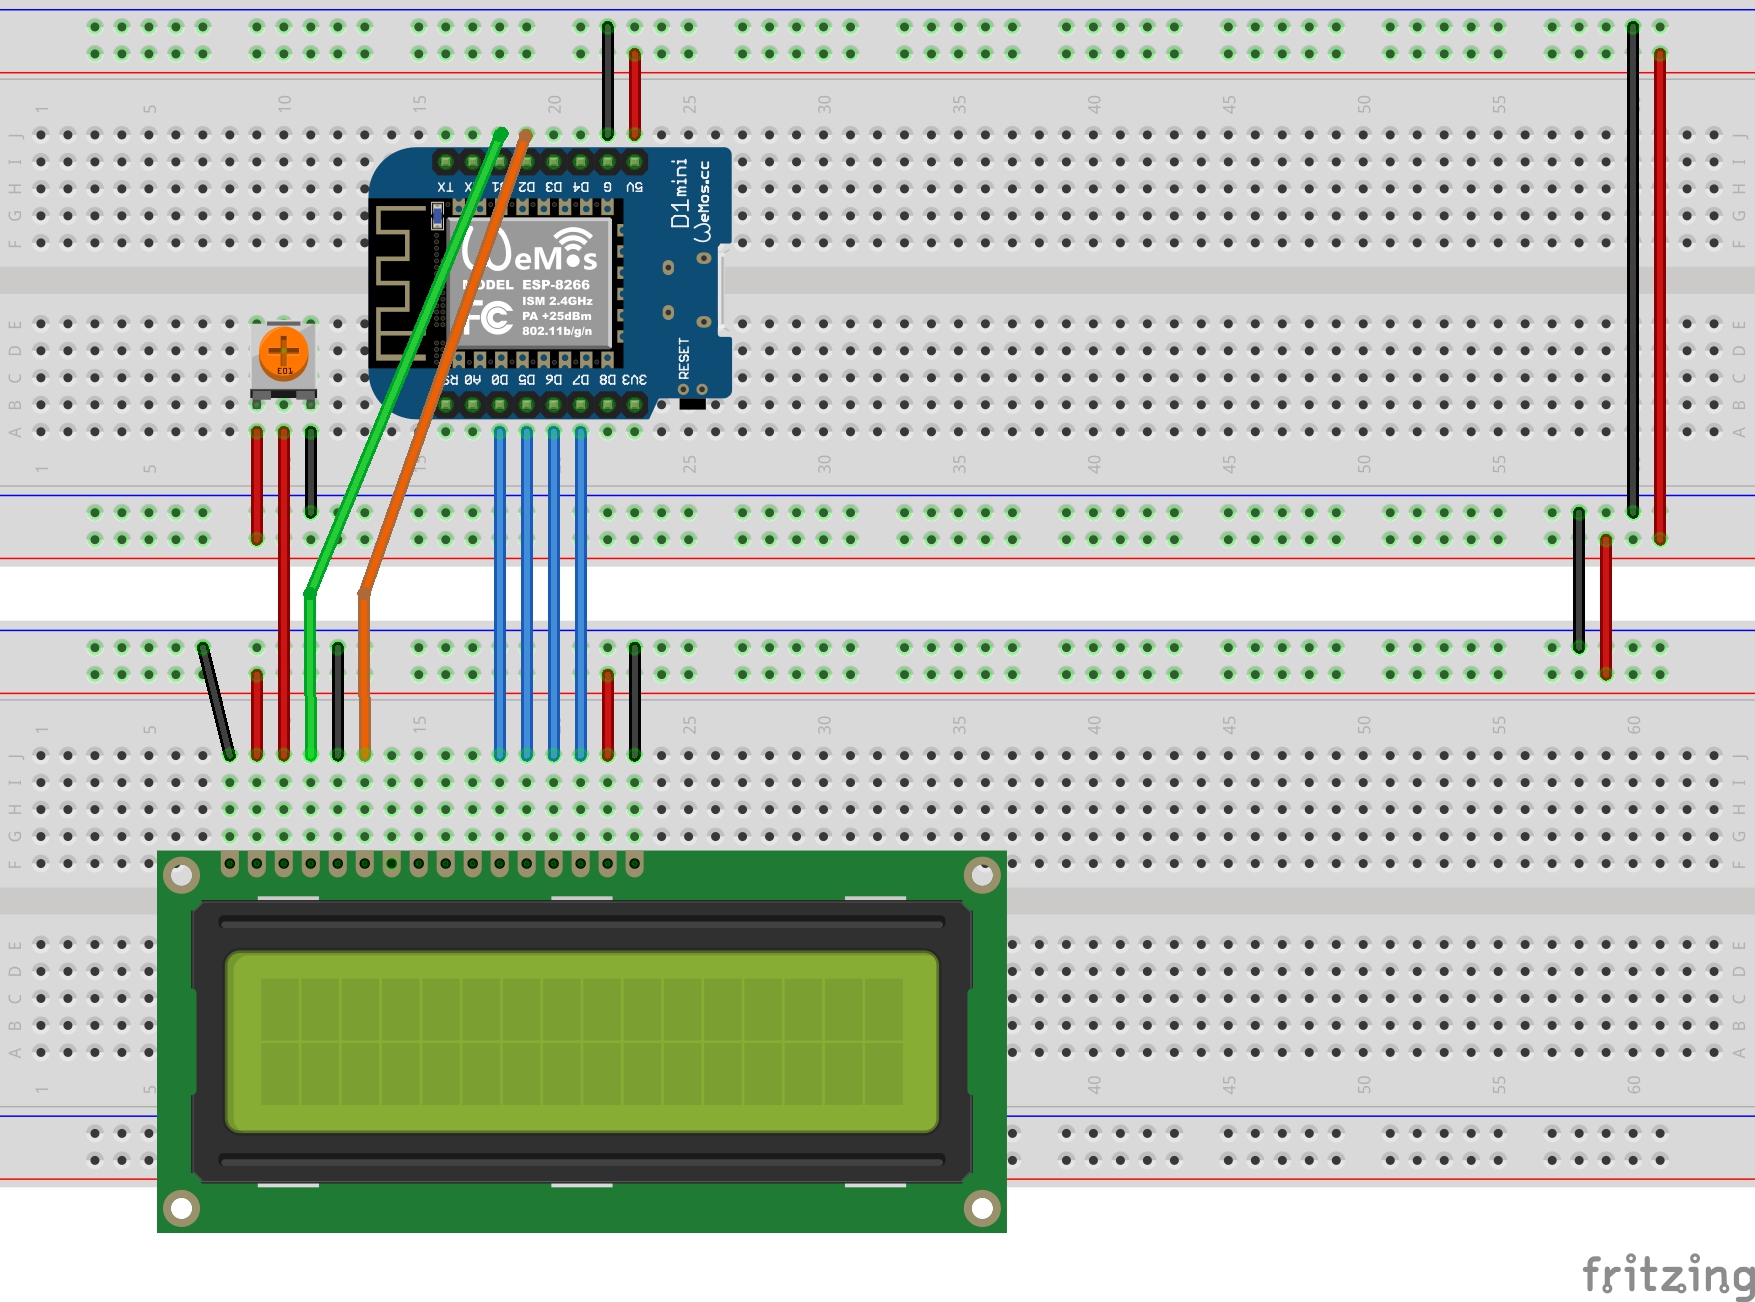
* 1602LCD ---- WeMos
* GND ---- GND
* VCC ---- 5V
* VE ---- Variable
resistor
* RS ---- D1(GPIO5)
* R/W ---- GND
* Enable ---- D2(GPIO4)
* DB0 ---- N.C
* DB1 ---- N.C
* DB2 ---- N.C
* DB3 ---- N.C
* DB4 ---- D0(GPIO16)
* DB5 ---- D5(GPIO14)
* DB6 ---- D6(GPIO12)
* DB7 ---- D7(GPIO13)
*
*/
#include "SPI.h"
#include <LiquidCrystal.h>
/* LiquidCrystal(rs, enable, d4, d5, d6, d7) */
LiquidCrystal lcd(5, 4, 16, 14, 12, 13);
void setup() {
// set up the LCD's number of columns and rows:
lcd.begin(16, 2);
// Print a message to the LCD.
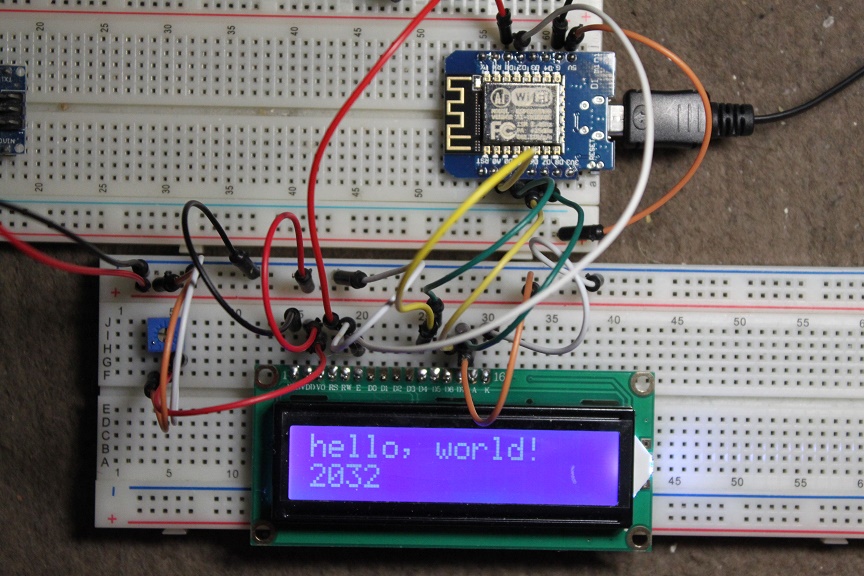
lcd.print("hello, world!");
}
void loop() {
// set the cursor to column 0, line 1
// (note: line 1 is the second row, since counting
begins with 0):
lcd.setCursor(0, 1);
// print the number of seconds since reset:
lcd.print(millis() / 1000);
}
|