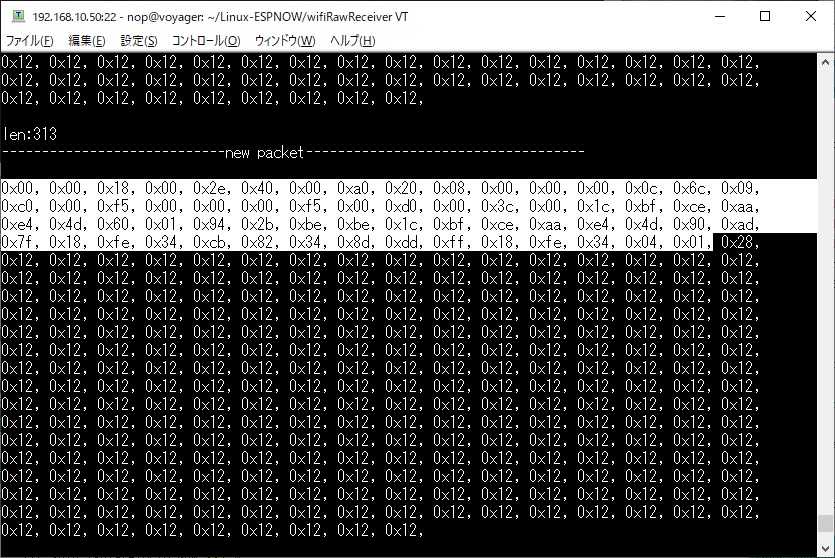
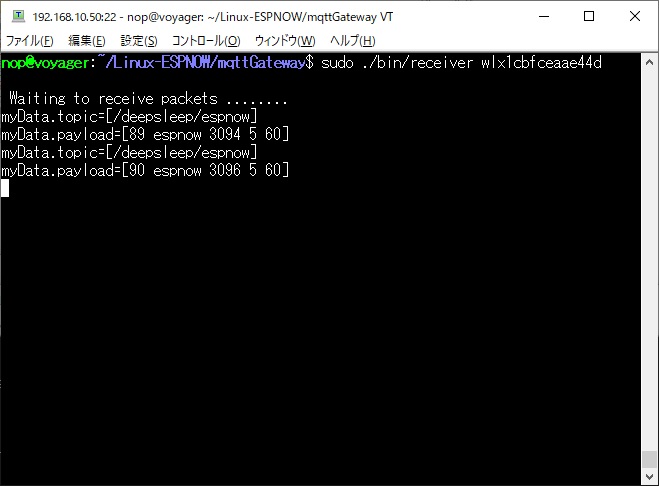
ESP8266を電池で使う

ESP-NOWで動かしてみる


ESP8266を乾電池で動かす試みはいろいろなところで紹介されていますが、ほとんどがWiFiを前提としています。
ESP8266ではWiFiの他に、ESP-NOWという無線通信を使うことができますが、ESP8266ではESP-NOWとWiFiを同時に 使うことができません。
ESP-NOWをネットワーク環境で使う場合、以下の様にUARTなどを経由して、別のマイコンを使ってWiFiに変換する必要が有ります。


ESP32でもESP-NOWを使うことができますが、ESP32ではESP-NOWとWiFiを同時に使うことができるようになりました。
以下の様にESP-NOWとWiFiのGatewayを置くだけで、ESP-NOWをネットワーク内で使うことができます。
Gatewayのソースはこちらで 公開しています。


ESP-NOWは消費電力が低いと言われています。
そこで、WiFiとESP-NOWの消費電力を比べてみました。
使用したマイコンはESP12Eで、ブレッドボードパターンのユニバーサル基盤に起動用の抵抗と220μのパスコンを設置しています。
ちなみに使用したユニバーサル基盤はAliの1111セールで10枚、$6.17で購入したものです。
別途送料がかかりますが、30枚でトータル$25.84でした。
抵抗が沢山付いていますが、パターンをまたぐ際に0Ω抵抗を使って絶縁しています。
使用した乾電池はビックカメラブランドの東芝製品です。


こちらがWiFiのスケッチです。
1分毎の間欠動作でMQTTを使ってデータを送信します。
#include <ESP8266WiFi.h>
#include <PubSubClient.h>

ADC_MODE(ADC_VCC);

#define SLEEP 60   // 1 minite sleep
#define MQTT_TOPIC "/deepsleep/wifi"

// Update these with values suitable for your network.
const char* ssid = "アクセスポイントのSSID";
const char* password = "アクセスポイントのパスワード";
const char* mqtt_server = "MQTTブローカーのIPアドレス";

WiFiClient espClient;
PubSubClient client(espClient);

char topic[64];
char payload[64];

// RTC memory (128*4byte,512Byte) structure
struct {
  uint32_t counter;
  byte data[508]; // User Data (unused)
} rtcData;

// Receive MQTT topic
void callback(char* topic, byte* payload, unsigned int length) {
  Serial.print("Message arrived [");
  Serial.print(topic);
  Serial.print("] ");
  for (int i = 0; i < length; i++) {
    Serial.print((char)payload[i]);
  }
  Serial.println();
}

// Connect MQTT server
void server_connect() {
  char clientid[20];

  sprintf(clientid,"ESP8266-%06x",ESP.getChipId());
  Serial.print("clientid=");
  Serial.println(clientid);
  // Loop until we're reconnected
  while (!client.connected()) {
    Serial.print("Attempting MQTT connection...");
    // Attempt to connect
    if (client.connect(clientid)) {
      Serial.println("connected");
    } else {
      Serial.print("failed, rc=");
      Serial.print(client.state());
      Serial.println(" try again in 5 seconds");
      // Wait 5 seconds before retrying
      delay(5000);
    }
  }
}

void setup() {
  delay(1000);
  Serial.begin(115200);
  Serial.print("ESP.getResetReason()=");
  Serial.println(ESP.getResetReason());
  String resetReason = ESP.getResetReason();

  /*
  enum rst_reason {
  REANSON_DEFAULT_RST = 0, // ノーマルスタート。電源オンなど。
  REANSON_WDT_RST = 1, // ハードウェアウォッチドッグによるリセット
  REANSON_EXCEPTION_RST = 2, // 例外によるリセット。GPIO状態は変化しない
  REANSON_SOFT_WDT_RST = 3, // ソフトウェアウォッチドッグによるリセット。GPIO状態は変化しない
  REANSON_SOFT_RESTART = 4, // ソフトウェアによるリセット。GPIO状態は変化しない
  REANSON_DEEP_SLEEP_AWAKE= 5, // ディープスリープ復帰
  REANSON_EXT_SYS_RST = 6, // 外部要因(RSTピン)によるリセット。
  };
  */

  rst_info *prst = ESP.getResetInfoPtr();
  /*
  struct rst_info{
      uint32 reason;
      uint32 exccause;
      uint32 epc1;
      uint32 epc2;
      uint32 epc3;
      uint32 excvaddr;
      uint32 depc;
  };
  */
  Serial.print("reset reason=");
  Serial.println(prst->reason);

  // Read data from RTC memory
  if (ESP.rtcUserMemoryRead(0, (uint32_t*) &rtcData, sizeof(rtcData))) {
    Serial.println("rtcUserMemoryRead Success");
    if (prst->reason != 5) { // Not REANSON_DEEP_SLEEP_AWAKE
      rtcData.counter = 0;
    } else  {
      rtcData.counter++;
    }
  } else {
    Serial.println("rtcUserMemoryRead Fail");
  }

  // Write data to RTC memory
  if (ESP.rtcUserMemoryWrite(0, (uint32_t*) &rtcData, sizeof(rtcData))) {
    Serial.println("rtcUserMemoryWrite Success");
  } else {
    Serial.println("rtcUserMemoryWrite Fail");
  }

  // Connect AP
  WiFi.mode(WIFI_STA);
  WiFi.begin(ssid, password);

  while (WiFi.status() != WL_CONNECTED) {
    delay(500);
    Serial.print(".");
  }

  Serial.println("");
  Serial.println("WiFi connected");
  Serial.print("IP address: ");
  Serial.println(WiFi.localIP());

  // Connect mqtt broker
  client.setServer(mqtt_server, 1883);
  client.setCallback(callback);
  if (server_connect()) {
    sprintf(topic,MQTT_TOPIC);
    sprintf(payload,"%d wifi %d %d %d",rtcData.counter,ESP.getVcc(),prst->reason,SLEEP,SLEEP);
    Serial.print(topic);
    Serial.print(":");
    Serial.println(payload);
    client.publish(topic, payload);
    client.disconnect();
  }
 
  delay(1000);
  WiFi.disconnect();

  // Goto DEEP SLEEP
  Serial.println("DEEP SLEEP START!!");
  uint32_t time_us = SLEEP * 1000 * 1000;
  ESP.deepSleep(time_us, WAKE_RF_DEFAULT);
}

void loop() {
  client.loop();
}

こちらがESP-NOWのスケッチです。
WiFiと同様に1分毎の間欠動作でESP-NOWを使ってデータを送信し、GatewayでMQTTに変換します。
ESP-NOWのAPIはこ ちらで確認することができます。
#include <ESP8266WiFi.h>
#include <espnow.h>

ADC_MODE(ADC_VCC);

#define SLEEP 60   // 1 minite sleep
#define MQTT_TOPIC "/deepsleep/espnow"

// REPLACE WITH RECEIVER MAC Address
byte remoteDevice[6] = {0x30, 0xae, 0xa4, 0xca, 0xe1, 0x41};

// Structure example to send data
// Must match the receiver structure
typedef struct struct_message {
  char topic[64];
  char payload[64];
} struct_message;

// Create a struct_message called myData
struct_message myData;

// RTC memory (128*4byte,512Byte) structure
struct {
  uint32_t counter;
  byte data[508]; // User Data (unused)
} rtcData;

bool esp_now_send_status;

// Callback when data is sent
void OnDataSent(uint8_t *mac_addr, uint8_t sendStatus) {
  Serial.print("Last Packet Send Status: ");
  if (sendStatus == 0){
    Serial.println("Delivery success");
  }
  else{
    Serial.println("Delivery fail");
  }
  esp_now_send_status = true;
}

// Callback when data is received
void ICACHE_FLASH_ATTR simple_cb(u8 *macaddr, u8 *data, u8 len) {

}


void setup() {
  // Init Serial Monitor
  Serial.begin(115200);
  Serial.println();

  Serial.print("ESP.getResetReason()=");
  Serial.println(ESP.getResetReason());
  String resetReason = ESP.getResetReason();
 
  /*
  enum rst_reason {
  REANSON_DEFAULT_RST = 0, // ノーマルスタート。電源オンなど。
  REANSON_WDT_RST = 1, // ハードウェアウォッチドッグによるリセット
  REANSON_EXCEPTION_RST = 2, // 例外によるリセット。GPIO状態は変化しない
  REANSON_SOFT_WDT_RST = 3, // ソフトウェアウォッチドッグによるリセット。GPIO状態は変化しない
  REANSON_SOFT_RESTART = 4, // ソフトウェアによるリセット。GPIO状態は変化しない
  REANSON_DEEP_SLEEP_AWAKE= 5, // ディープスリープ復帰
  REANSON_EXT_SYS_RST = 6, // 外部要因(RSTピン)によるリセット。
  };
  */

  rst_info *prst = ESP.getResetInfoPtr();
  /*
  struct rst_info{
      uint32 reason;
      uint32 exccause;
      uint32 epc1;
      uint32 epc2;
      uint32 epc3;
      uint32 excvaddr;
      uint32 depc;
  };
  */
  Serial.print("reset reason=");
  Serial.println(prst->reason);

  // Read data from RTC memory
  if (ESP.rtcUserMemoryRead(0, (uint32_t*) &rtcData, sizeof(rtcData))) {
    Serial.println("rtcUserMemoryRead Success");
    if (prst->reason != 5) { // Not REANSON_DEEP_SLEEP_AWAKE
      rtcData.counter = 0;
    } else  {
      rtcData.counter++;
    }
  } else {
    Serial.println("rtcUserMemoryRead Fail");
  }

  // Write data to RTC memory
  if (ESP.rtcUserMemoryWrite(0, (uint32_t*) &rtcData, sizeof(rtcData))) {
    Serial.println("rtcUserMemoryWrite Success");
  } else {
    Serial.println("rtcUserMemoryWrite Fail");
  }

  // Set device as a Wi-Fi Station
  WiFi.mode(WIFI_STA);

  // Init ESP-NOW
  if (esp_now_init() != 0) {
    Serial.println("Error initializing ESP-NOW");
    return;
  }

  // Once ESPNow is successfully Init, we will register for Send CB to
  // get the status of Trasnmitted packet
  esp_now_set_self_role(ESP_NOW_ROLE_CONTROLLER);
  esp_now_register_send_cb(OnDataSent);
  esp_now_register_recv_cb(simple_cb);
 
  // Register peer
  // If the channel is set to 0, data will be sent on the current channel.
  esp_now_add_peer(remoteDevice, ESP_NOW_ROLE_SLAVE, 0, NULL, 0);
  //esp_now_add_peer(NULL, ESP_NOW_ROLE_CONTROLLER, 0, NULL, 0);
  //esp_now_add_peer(NULL, ESP_NOW_ROLE_CONTROLLER, 1, NULL, 0);

  // Set values to send
  strcpy(myData.topic, MQTT_TOPIC); // "/mqtt/espnow";
  sprintf(myData.payload,"%d espnow %d %d %d",rtcData.counter,ESP.getVcc(),prst->reason,SLEEP);
 
  // Send message via ESP-NOW
  esp_now_send_status = false;
  esp_now_send(remoteDevice, (uint8_t *) &myData, sizeof(myData));

  // Wait until send complete
  while(1) {
    if (esp_now_send_status) break;
    delay(1);
  }

  // Goto DEEP SLEEP
  Serial.println("DEEP SLEEP START!!");
  uint32_t time_us = SLEEP * 1000 * 1000;
  ESP.deepSleep(time_us, WAKE_RF_DEFAULT);
}

void loop() {
}

WiFiの方は7118回で終了しました。
1分間の間欠動作なので7118分=118時間=4.9日となります。
ESP-NOWの方はまだまだ元気に動いていますが、同じ7118回目の電源電圧(ESP.getVccの値)を比較 してみました。
明らかにESP-NOWの方が省電力です。


WiFiのStationモードでは、APに接続するまでに大体6秒程度(実測値で平均6380ミリ秒)必要ですが、ESP-NOWは初期設定が 終わるまで1ミリ秒以下で す。
この違いが電池の消耗に影響しています。


30日後の状態です。
ESPNOWはまだ動いています。


30日分のデータが取れたので、一次関数による近似グラフを作って、この先を予測してみました。
X軸目盛は30日が1目盛りです。
GetVccの値が2.5Vになるのは90日後となりました。
始めたのが2020年12月18日 10:11:59なので、2021年3月末ごろの予想です。


2021年4月12日 21:22に力尽きました。
始めたのが2020年12月18日 10:11:59なので、ほぼほぼ4か月間動き続けたことになります。
単三乾電池2本で4か月なら十分です。
$ tail hoge.log
2021/04/12 21:13:30 /deepsleep/espnow 167443 espnow 2808 5 60
2021/04/12 21:14:30 /deepsleep/espnow 167444 espnow 2806 5 60
2021/04/12 21:15:29 /deepsleep/espnow 167445 espnow 2808 5 60
2021/04/12 21:16:29 /deepsleep/espnow 167446 espnow 2808 5 60
2021/04/12 21:17:28 /deepsleep/espnow 167447 espnow 2810 5 60
2021/04/12 21:18:28 /deepsleep/espnow 167448 espnow 2806 5 60
2021/04/12 21:19:28 /deepsleep/espnow 167449 espnow 2805 5 60
2021/04/12 21:20:27 /deepsleep/espnow 167450 espnow 2808 5 60
2021/04/12 21:21:27 /deepsleep/espnow 167451 espnow 2806 5 60
2021/04/12 21:22:26 /deepsleep/espnow 167452 espnow 2808 5 60


ESP12EよりもESP-WROOM-02の方が低い電圧でDeepSleepから復帰できることが分かりました。
ESP-NOWよりも電力を必要とするWiFiを使ったテストでは2.090VでもDeepSleepから復帰できました。
以下の表はDeelSleepから復帰できる電圧の低い順に並んでいます。
ESP13は2.548Vで復帰できなくなりましたが、回数はESP12Eよりも多いです。
ESP13はモジュールにLEDが付いていないのが影響していると思われます。
ESP8285はESP8266よりも低電圧で動くという情報を見たことが有りますが、どうも誤りみたいです。
製品 CPU Sleepから復帰できる電圧(V) Sleepから復帰した回数
ESP-WROOM-02 ESP8266 2.090 14099
ESP07S ESP8266 2.169 12646
ESP12S ESP8266 2.199 12628
ESP-S ESP8285 2.271 11371
ESP-M2 ESP8285 2.301 10661
ESP12E ESP8266 2.506 7125
ESP13 ESP8266 2.548 10376

こちらがESP-WROOM-02を使って、単三乾電池2本とESP-NOWで112日間稼働した時のGetVccの値です。
一時的に2.7V以下まで供給電圧が落ちていますが、DeepSleepから復帰しています。
アクシデント(電源供給のピンが基板から外れた)が有って、途中でテストを中断しましたが、アクシデントが無ければ6か月ぐらい動き続けたかもし れません。


こちら
にLinuxで動くESP-NOWのサンプルが公開されています。
Ubuntu 20.04で試してみました。

まず、LinuxマシンにUSB-WiFiドングルを刺して、以下のコマンドでドライバーが対応しているかどうかを調べます。
$ nmcli device wifi
*  SSID                MODE   CHAN  RATE       SIGNAL  BARS  SECURITY
   ap-wpsG-a8bf10      Infra  1     54 Mbit/s  89      ????  WPA2
   Picking             Infra  1     54 Mbit/s  50      ??__  WPA2
   88888888            Infra  11    54 Mbit/s  40      ??__  WPA2
   ゲストネットワーク  Infra  11    54 Mbit/s  44      ??__  WPA2
   inumber             Infra  1     54 Mbit/s  44      ??__  WPA2
   aterm-e625c0-gw     Infra  1     54 Mbit/s  100     ????  WEP
   ESP_1B06BB          Infra  1     54 Mbit/s  100     ????  --
   ESP_011834          Infra  1     54 Mbit/s  70      ???_  --
   ESP_CCE2F9          Infra  1     54 Mbit/s  57      ???_  --
*  aterm-e625c0-g      Infra  1     54 Mbit/s  84      ????  WPA1 WPA2
   W04_F0C850604726    Infra  1     54 Mbit/s  47      ??__  WPA1 WPA2
   au_Wi-Fi            Infra  11    54 Mbit/s  40      ??__  WPA2
   0001_Secured_Wi-Fi  Infra  6     54 Mbit/s  44      ??__  WPA2 802.1X
   0000_Secured_Wi-Fi  Infra  6     54 Mbit/s  40      ??__  WPA2
   0001docomo          Infra  6     54 Mbit/s  40      ??__  WPA2 802.1X
   Wi2premium          Infra  11    54 Mbit/s  40      ??__  --
   --                  Infra  1     54 Mbit/s  37      ??__  WPA2
   --                  Infra  8     54 Mbit/s  47      ??__  WEP
   aterm-bb1f8e-g      Infra  8     54 Mbit/s  40      ??__  WPA1 WPA2

次に以下のコマンドを使用して、WiFiデバイスの名前とMACアドレスを求めます。
下線部分が名前とMACアドレスです。
$ iwconfig
lo        no wireless extensions.

enp2s0    no wireless extensions.

wlx1cbfceaae44d  IEEE 802.11  ESSID:off/any
          Mode:Managed  Access Point: Not-Associated   Tx-Power=20 dBm
          Retry short limit:7   RTS thr:off   Fragment thr:off
          Power Management:off


$ sudo ifconfig wlx1cbfceaae44d
wlx1cbfceaae44d: flags=4099<UP,BROADCAST,MULTICAST>  mtu 1500
        ether 1c:bf:ce:aa:e4:4d  txqueuelen 1000  (イーサネット)
        RX packets 0  bytes 0 (0.0 B)
        RX errors 0  dropped 0  overruns 0  frame 0
        TX packets 0  bytes 0 (0.0 B)
        TX errors 0  dropped 0 overruns 0  carrier 0  collisions 0

WiFiデバイスをモニターモードに変更します。
$ sudo ifconfig wlx1cbfceaae44d down

$ sudo iwconfig wlx1cbfceaae44d mode monitor

$ sudo ifconfig wlx1cbfceaae44d up

$ sudo ifconfig wlx1cbfceaae44d
wlx1cbfceaae44d: flags=4099<UP,BROADCAST,MULTICAST>  mtu 1500
        unspec 1C-BF-CE-AA-E4-4D-00-00-00-00-00-00-00-00-00-00  txqueuelen 1000  (不明なネット)
        RX packets 2412317  bytes 380570756 (380.5 MB)
        RX errors 0  dropped 109773  overruns 0  frame 0
        TX packets 0  bytes 0 (0.0 B)
        TX errors 0  dropped 0 overruns 0  carrier 0  collisions 0

これでESP-NOWのプロトコルが使えるようになります。
githubからリポジトリをクローンし、コンパイルします。
実行時の引数にはWiFiデバイスの名前を指定します。
$ git clone https://github.com/thomasfla/Linux-ESPNOW

$ cd Linux-ESPNOW

$ cd wifiRawReceiver

$ make
mkdir -p bin
gcc main.c -Wall -o bin/receiver

$ sudo ./bin/receiver wlx1cbfceaae44d

 Waiting to receive packets ........


こ ちらのスケッチをESP8266に書き込みます。
ビルドが終わると、Linux側にはこのように表示されます。
len:313
----------------------------new packet-----------------------------------

0x00, 0x00, 0x18, 0x00, 0x2e, 0x40, 0x00, 0xa0, 0x20, 0x08, 0x00, 0x00, 0x00, 0x0c, 0x6c, 0x09,
0xc0, 0x00, 0xf9, 0x00, 0x00, 0x00, 0xf9, 0x00, 0xd0, 0x00, 0x3c, 0x00, 0x1c, 0xbf, 0xce, 0xaa,
0xe4, 0x4d, 0x60, 0x01, 0x94, 0x2b, 0xbe, 0xbe, 0x1c, 0xbf, 0xce, 0xaa, 0xe4, 0x4d, 0x00, 0x5c,
0x7f, 0x18, 0xfe, 0x34, 0x6d, 0x59, 0x1a, 0x33, 0xdd, 0xff, 0x18, 0xfe, 0x34, 0x04, 0x01, 0xab,
0xc3, 0xa7, 0x16, 0x12, 0x12, 0x12, 0x12, 0x12, 0x12, 0x12, 0x12, 0x12, 0x12, 0x12, 0x12, 0x12,
0x12, 0x12, 0x12, 0x12, 0x12, 0x12, 0x12, 0x12, 0x12, 0x12, 0x12, 0x12, 0x12, 0x12, 0x12, 0x12,
0x12, 0x12, 0x12, 0x12, 0x12, 0x12, 0x12, 0x12, 0x12,


Linux側のコードを少し変えて確認してみましたが、以下の部分(63バイト)がヘッダーです。


以下の部分がESP-NOWのデータ部分(250バイト)です。


1分毎の間欠動作でESP-NOWを使ってデータを送信するスケッチを書き込んでみました。
ヘッダーのサイズが分かったので、Linux側のコードを少し変更して実行しました。
topicとpayloadが取れています。


続く...