/*
* publish to esp_mqtt server
* https://github.com/martin-ger/esp_mqtt
*/
#include <ESP8266WiFi.h>
#include <PubSubClient.h> //
https://github.com/knolleary/pubsubclient
#define INTERVAL
10
#define MQTT_SERVER
"192.168.4.1" // esp_mqtt server
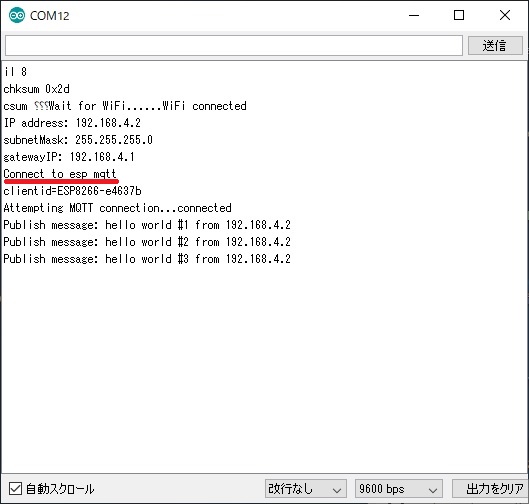
//#define MQTT_SERVER
"esp_mqtt" // esp_mqtt
server
#define MQTT_PORT 1883
#define MQTT_WILL_TOPIC "nopnop2002/will" // You can
change
#define MQTT_WILL_MSG "I am leaving..." // You
can change
#define MQTT_PUB_TOPIC
"nopnop2002/" // You can change
const char* SSID = "MyAP";
const char* PASSWORD = "";
WiFiClient espClient;
PubSubClient client(espClient);
unsigned long lastMillis;
char localIP[20];
void errorDisplay(char* buff) {
Serial.print("Error:");
Serial.println(buff);
while(1) {
delay(200);
}
}
void setup() {
delay(1000);Serial.begin(9600);
Serial.print("Wait for WiFi...");
WiFi.begin(SSID, PASSWORD);
while (WiFi.status() != WL_CONNECTED) {
delay(500);
Serial.print(".");
}
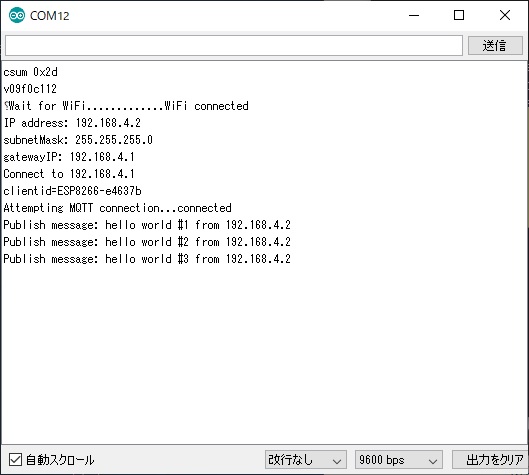
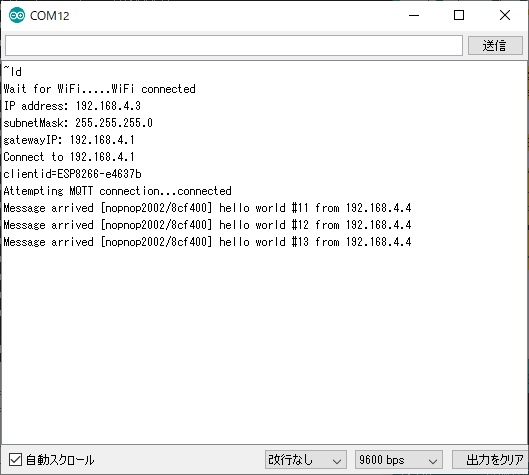
Serial.println("WiFi connected");
Serial.print("IP address: ");
Serial.println(WiFi.localIP());
Serial.print("subnetMask: ");
Serial.println(WiFi.subnetMask());
Serial.print("gatewayIP: ");
Serial.println(WiFi.gatewayIP());
strcpy (localIP,
WiFi.localIP().toString().c_str());
Serial.print("Connect to ");
Serial.println(MQTT_SERVER);
client.setServer(MQTT_SERVER, MQTT_PORT);
char clientid[20];
sprintf(clientid,"ESP8266-%06x",ESP.getChipId());
Serial.print("clientid=");
Serial.println(clientid);
Serial.print("Attempting MQTT connection...");
// Attempt to connect
if (strlen(MQTT_WILL_TOPIC)) {
if
(!client.connect(clientid,MQTT_WILL_TOPIC,0,0,MQTT_WILL_MSG))
{
errorDisplay("connect
Fail");
}
} else {
if (!client.connect(clientid)) {
errorDisplay("connect
Fail");
}
}
Serial.println("connected");
lastMillis = millis();
}
void loop() {
static int counter=0;
static int value = 0;
char msg[64];
char topic[64];
if (Serial.available() > 0) {
char inChar = Serial.read();
Serial.println("KeyIn");
client.disconnect();
Serial.println("Publish end");
while(1) { }
}
if (!client.connected()) {
errorDisplay("not connect");
}
client.loop();
long now = millis();
if (now - lastMillis > 1000) {
lastMillis = now;
counter++;
if (counter > INTERVAL) {
++value;
sprintf (topic,"%s%06x",
MQTT_PUB_TOPIC, ESP.getChipId());
sprintf (msg, "hello world
#%ld from %s", value, localIP);
Serial.print("Publish
message: ");
Serial.println(msg);
if (!client.publish(topic,
msg)) {
errorDisplay("publish fail");
}
counter=0;
}
}
} |