#!/usr/bin/env python
import time
import signal
import sys
from PyMata.pymata import PyMata
# Digital pins
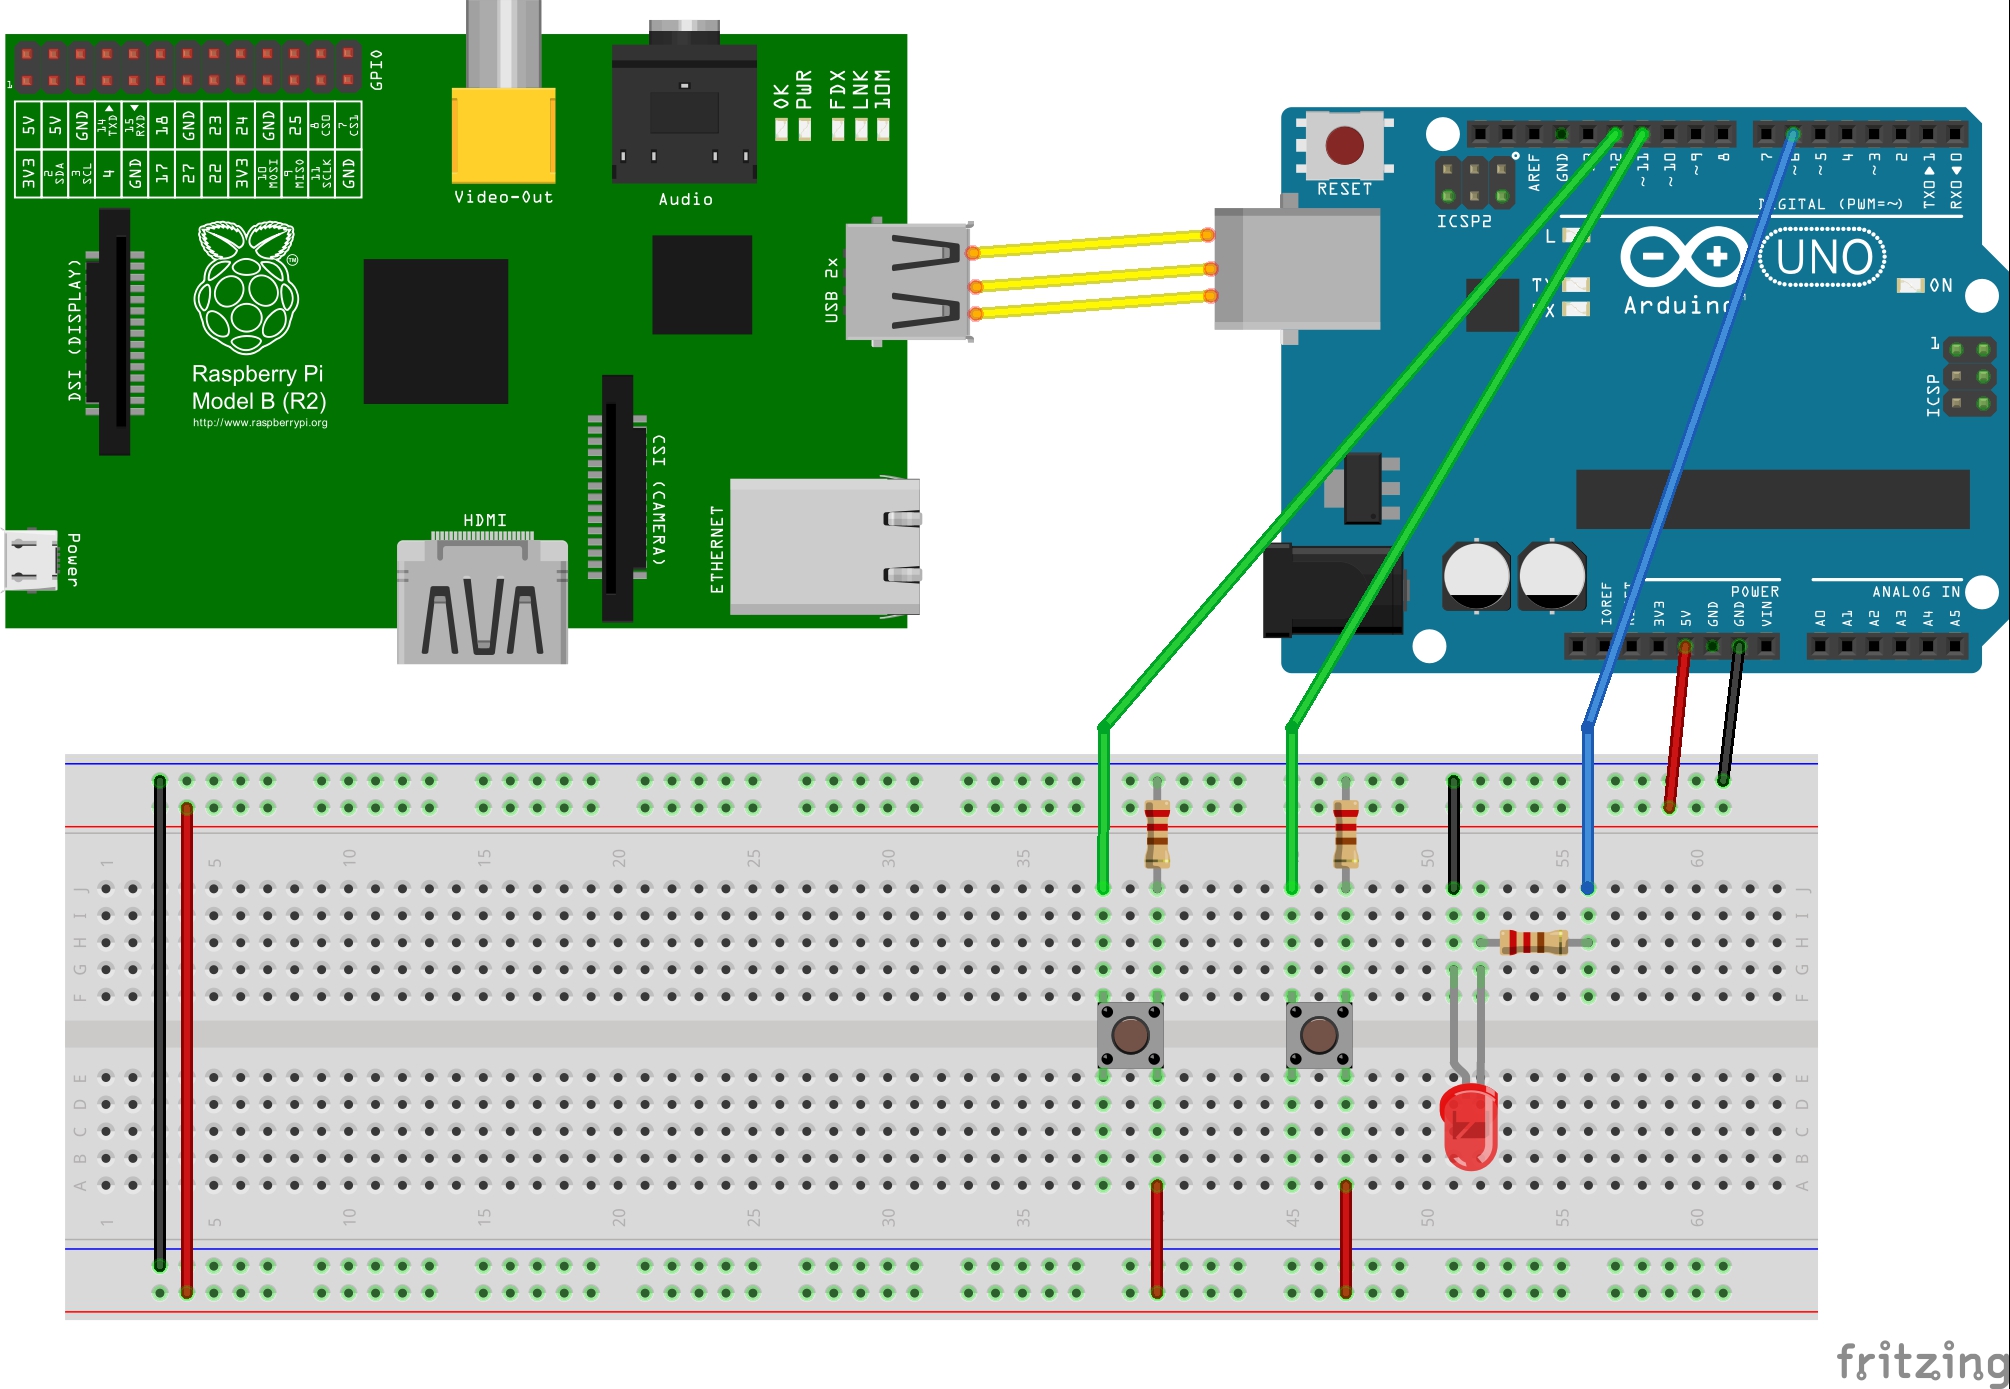
GREEN_LED = 6
PUSH_BUTTON1 = 11
PUSH_BUTTON2 = 12
# Switch states
ON = 1
OFF = 0
# Callback function
# Set the LED to current state of the pushbutton switch
def cb_push_button(data):
print(data)
if data[1] == 11:
board.digital_write(GREEN_LED, ON)
else:
board.digital_write(GREEN_LED, OFF)
# Re-arm the latch to fire on the next
transition to high
board.set_digital_latch(PUSH_BUTTON1,
board.DIGITAL_LATCH_HIGH, cb_push_button)
board.set_digital_latch(PUSH_BUTTON2,
board.DIGITAL_LATCH_HIGH, cb_push_button)
def signal_handler(sig, frame):
print('You pressed Ctrl+C')
if board is not None:
board.close()
sys.exit(0)
signal.signal(signal.SIGINT, signal_handler)
# Create a PyMata instance
board = PyMata("/dev/ttyUSB0", verbose=True)
# Set pin modes
# Set the pin to digital output to light the green LED
board.set_pin_mode(GREEN_LED, board.OUTPUT, board.DIGITAL)
# Set the pin to digital input to receive button presses
board.set_pin_mode(PUSH_BUTTON1, board.INPUT,
board.DIGITAL)
board.set_pin_mode(PUSH_BUTTON2, board.INPUT,
board.DIGITAL)
# Arm the digital latch to detect when the button is
pressed
board.set_digital_latch(PUSH_BUTTON1,
board.DIGITAL_LATCH_HIGH, cb_push_button)
board.set_digital_latch(PUSH_BUTTON2,
board.DIGITAL_LATCH_HIGH, cb_push_button)
# A forever loop until user presses Ctrl+C
while 1:
pass
|