//
// test program for MCP23017 with wiringPi
// cc -o mcp23017Led mcp23017Led.c -l wiringPi
//
#include <stdio.h>
#include <time.h>
#include <wiringPi.h>
#include <wiringPiI2C.h>
#include <fcntl.h>
#include <sys/ioctl.h>
#define
IODIRA
0x00
// MCP23017 address of I/O direction
#define
IODIRB
0x01
// MCP23017 address of I/O direction
#define
GPIOA
0x12
// MCP23017 address of GP Value
#define
GPIOB
0x13
// MCP23017 address of GP Value
#define
ADDRESS
0x20
// MCP23017 I2C address
#define
I2C_SLAVE 0x0703
int main(int argc, char **argv) {
int i;
int fd;
int byte;
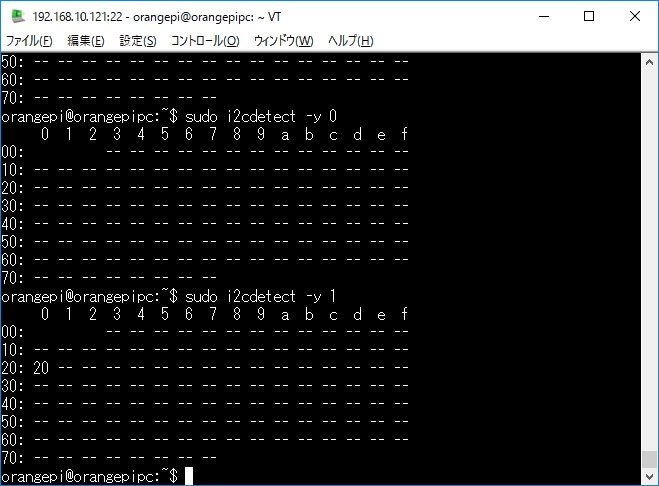
char *device0="/dev/i2c-0";
char *device1="/dev/i2c-1";
// if ((fd=wiringPiI2CSetup(ADDRESS))
== -1){
//
printf("wiringPiI2CSetup Error\n");
// return 1;
// }
if (argc == 1) {
printf("using /dev/i2c-0\n");
if ((fd = open (device0, O_RDWR))
< 0) {
printf("open Error\n");
return 1;
}
if (ioctl (fd, I2C_SLAVE, ADDRESS)
< 0) {
printf("open Error\n");
return 1;
}
} else {
printf("using /dev/i2c-1\n");
if ((fd = open (device1, O_RDWR))
< 0) {
printf("open Error\n");
return 1;
}
if (ioctl (fd, I2C_SLAVE, ADDRESS)
< 0) {
printf("open Error\n");
return 1;
}
}
wiringPiI2CWriteReg16(fd,IODIRA,0x00);
wiringPiI2CWriteReg16(fd,IODIRB,0x00);
wiringPiI2CWriteReg16(fd,GPIOA,0x00);
wiringPiI2CWriteReg16(fd,GPIOB,0x00);
byte=0;
for(i=0;i<8;i++) {
byte=(byte<<1) + 1;
wiringPiI2CWriteReg16(fd,GPIOA,byte);
delay(1000);
}
delay(2000);
for(i=0;i<10;i++) {
byte=0;
wiringPiI2CWriteReg16(fd,GPIOA,byte);
delay(100);
byte=0xff;
wiringPiI2CWriteReg16(fd,GPIOA,byte);
delay(100);
}
delay(2000);
byte=0xff;
for(i=0;i<8;i++) {
byte=(byte>>1);
wiringPiI2CWriteReg16(fd,GPIOA,byte);
delay(1000);
}
}
|